We use cookies to make your experience better. To comply with the new e-Privacy directive, we need to ask for your consent to set the cookies. Learn more.
Instructions for the Tesland.com illuminated door sills for Model S (V1.0)
Thank you for purchasing our Tesland.com illuminated door sills. We hope that you are satisfied with the product! Please read these instructions before installing the product. Although the installations is not hard and does not require any special skills, it can be handy to have some general knowledge of mechanics.
If you have any doubt doing this after reading these instructions, we recommend that you have the Tesland.com illuminated doorsills installed by a local professional.
An example of the installation can be seen here:
Precautions and general notes.
All rights reserved. No parts of this manual may be reproduced in any form without the express written permission of Tesland.com.
Tesland.com makes no representations or warranties with respect to the contents hereof. In addition, information contained herein are subject to change without notice. Every precaution has been taken in the preparation of this manual. Nevertheless, Tesland.com assumes no responsibility for errors or omissions or any damages resulting from the use of the information contained in this publication.
Tesland.com does not take any responsibilities if during the installations anything goes wrong. Sometimes some clips may break, they can be easily purchased and replaced.
Tesland.com can never be held responsible for replacement of any parts which will break during the installation, even when following these guidelines.
1. Removal of the original door sill.
- Start with the aft part of the door sill on the outside. Get your fingers between the rubber weatherguard and the doorsill, lift it enough to get your fingers under the aft part of the door sill. You might need a spider to initially lift the door sill
- Pull it away from the plastic piece which has to remain in the car until the metal retainer snaps loose. It must stay on the doorsill, however, if it stays in the part that remains in the car, you need to wiggle it out with a screwdriver and install it back to the doorsill.
- On the aft inside of the doorsill there is a plastic clips that needs to be unhooked from the part that stays in the car. Be careful not to break it.
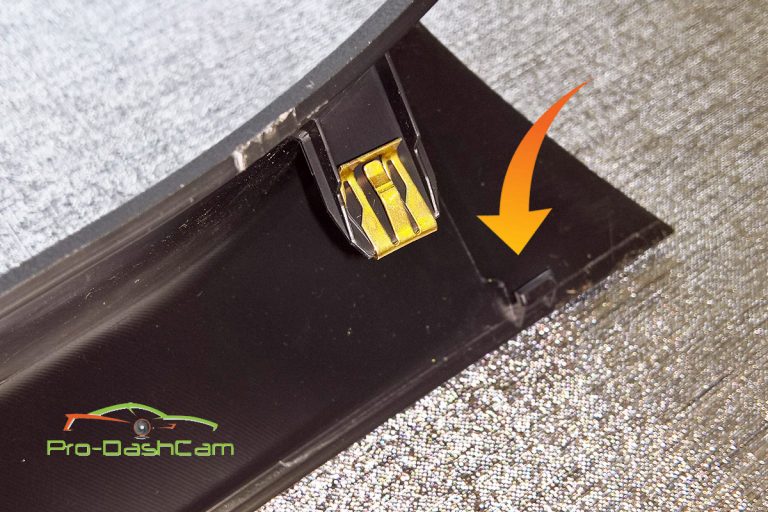
- When these are undone, you can lift the aft part of the doorsill. It is held in place with 2 plastic clips (one blue and one white)
- After lifting, the complete doorsill assembly can be pulled aft (held in place by another blue clip)
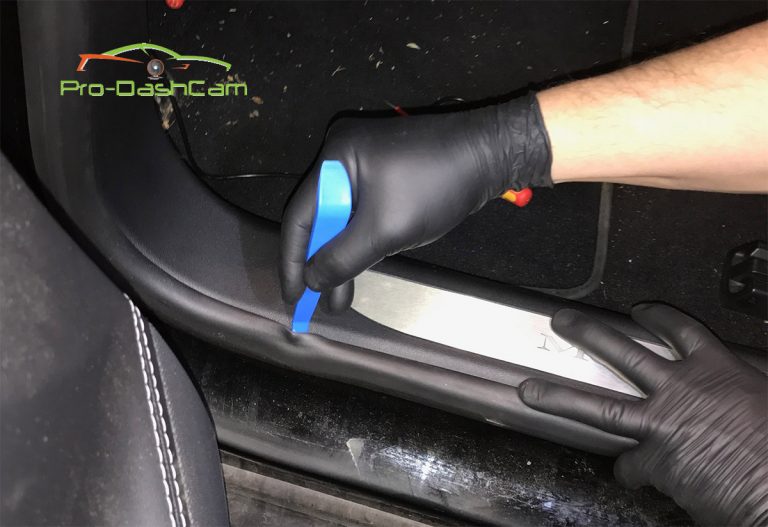
2. Removal of the original aluminium piece out of the doorsill.
- It is handy to move the complete doorsill to a workbench or large table.
- On the underside of the doorsill you can see a couple of with clips holding the aluminium part in place.
- Push these clips inwards and up so the aluminium part gets loose.
- The outside tips are held in place with 3M double adhesive tape.
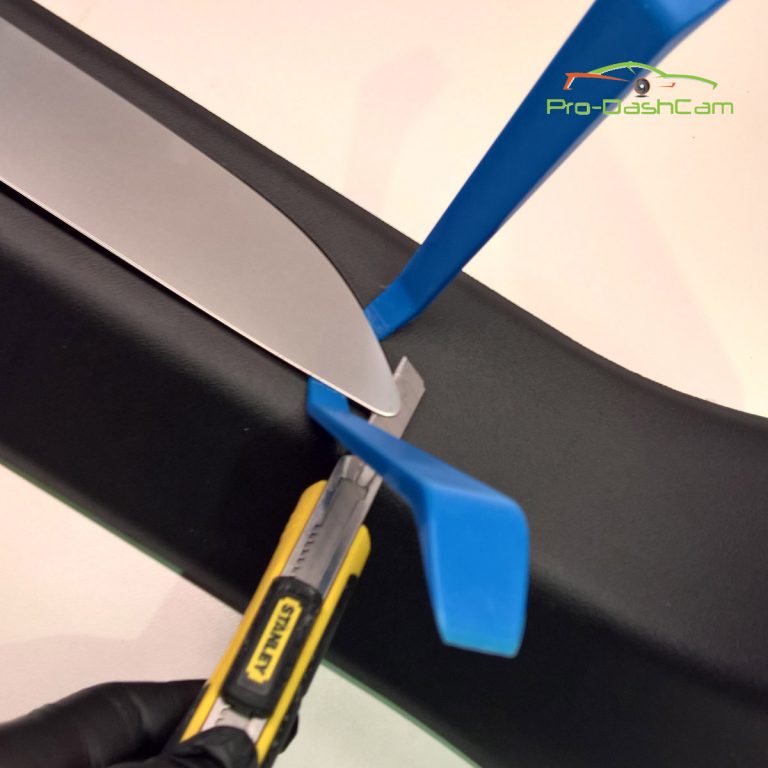
- If you want to discard the aluminium strip you can just pull it out and use a sharp knife to cut the 3M tape.
- However, if you want the aluminium part to remain intact, caution has to be taken, because the aluminium will bent very easily.
- To make it easier you can use a blow dryer to heat up the aluminium. This makes the 3M take more flexible. CAUTION: Using too much heat will melt the plastic doorsill.
- Start with prying a (preferable plastic) tool between the aluminium part and the plastic sill, just enough not to bent the aluminium, but enough to get a sharp knife in between, to cut the 3M tape. Work your way slowly to the end by cutting and slowly liftingBe careful not to cut with the knife in the plastic part, since this part remains visible.
- Continue working your way to get the 3M tape al the way cut, without bending the aluminium strip, and without damaging the plastic
- Do the same with the other end.
 8
8
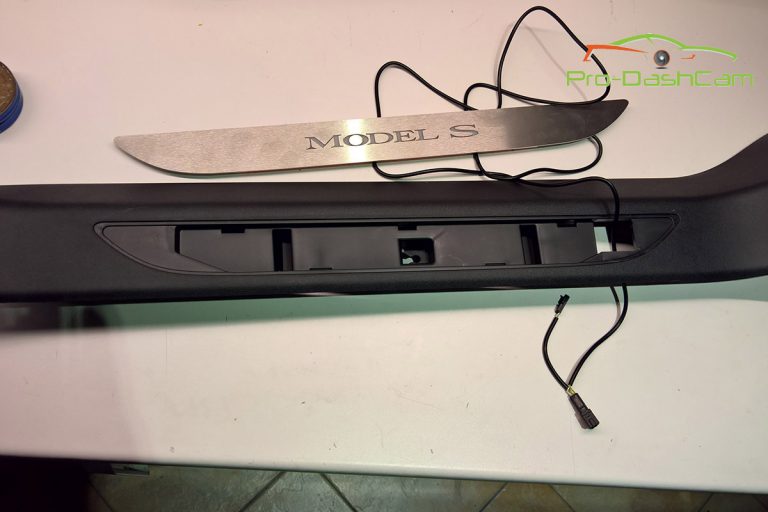
- Once the strip is out, remove the remains of the tape, this is the best to “roll” it away with your thumb.
3. Insertion of the Tesland.com illuminated door sill.
- Use the correct Tesland.com illuminated door sill for the side you are installing. (the wire must be on the forward side)
- Guide the wire from top to bottom threw the plastic door sill in the hole on the forward side.
- Try the Tesland.com illuminated door sill, and see if it fits nicely in place
- Clean the plastic door sill with the alcohol prep pad which you find in the package and let it dry.
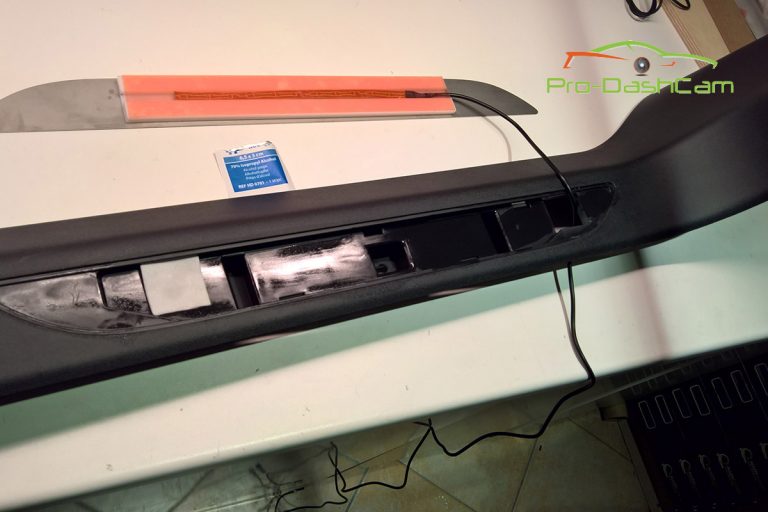
- Remove the backing from all the tape of the back of your Tesland.com illuminated door sill (end tips and under the plastic part).
- Be careful not to get the wire trapped under the tape and put the Tesland.com illuminated door sill in place, press firmly on the whole sill.
- Put one of the enclosed wire guides on the inside of the plastic doorsill next to the forward plastic clip and put the wire in.
4. Reinstalling the door sill.
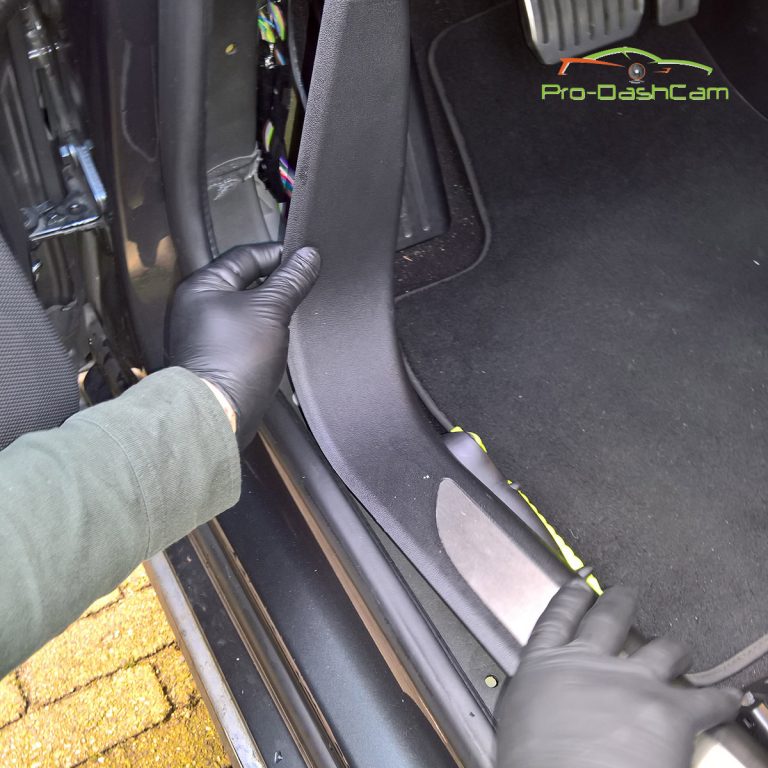
- The door sill can now be inserted starting on the forward side.
- Check if the most forward flap of the doorsill is in the correct position.
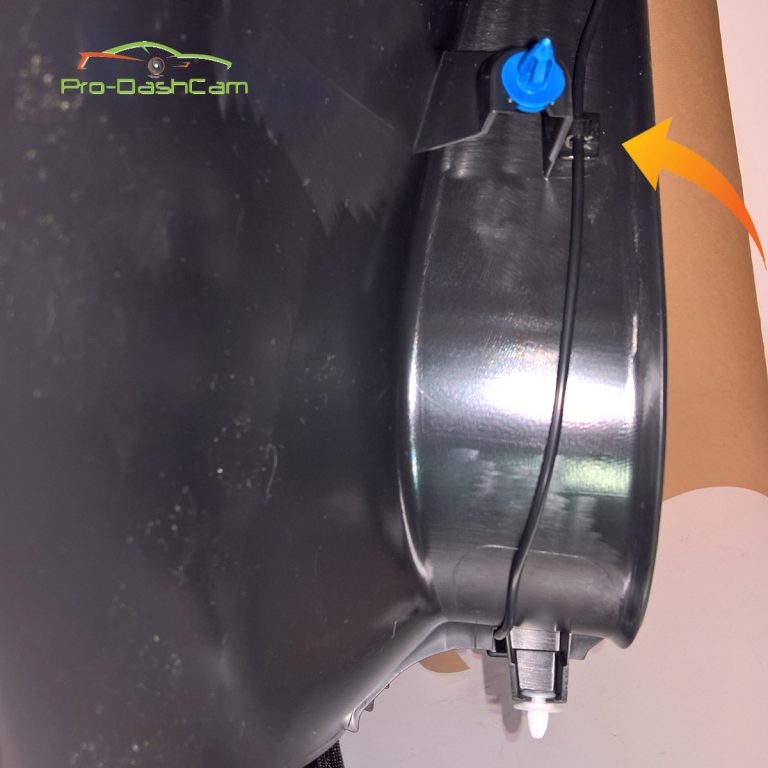
- Look between the doorsill and the metal of the car to see if the blue clip is exactly in front of its hole before proceeding.
- Push the forward blue clip in place.
- Slowly push the door sill down, check if the other blue and the white clips are exactly above their respective hole and check if the aft part is on the correct position.
- If so, you can press the doorsill in place, so all the retainer clips snap in position.
- Wiggle the rubber waeatherguardover the doorsill.
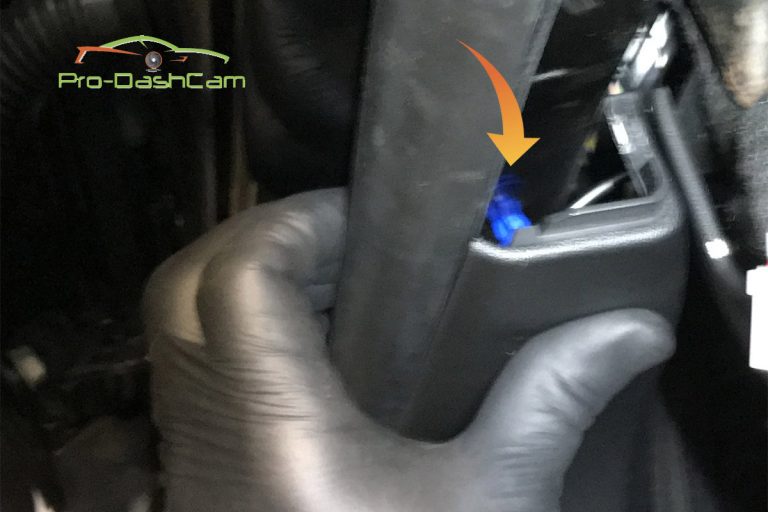
5. Removal of the footwell lights.
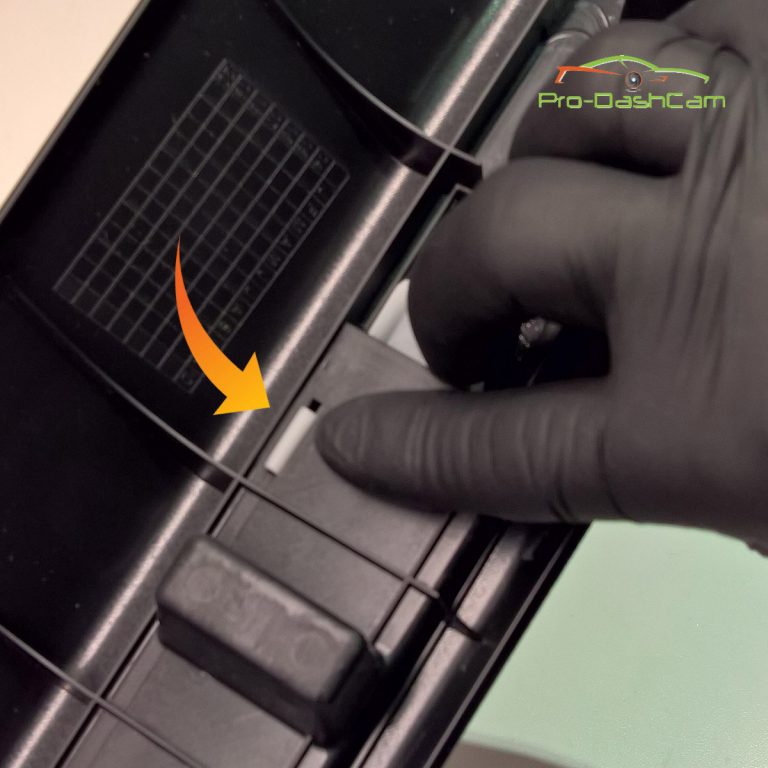
- Move the seats to its most aft position
- The best way to do this is lay on your back in the car and use a flashlight so you can see what you do.
- The lights are held in position by 2 clips on either short side of the light assembly and they are very firmly installed. The best practice is to use 2 medium size flathead screwdrivers, and push them in on one short side of the light. Try to get enough space so you can use the other screwdriver to push in the plastic clips, and wiggle the light out.
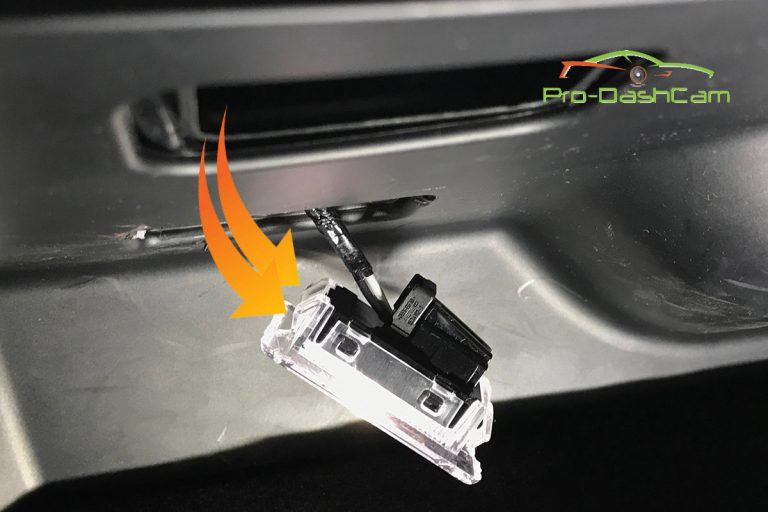
- To get the wire out, push in the retainer-latch on the cable side of the connector.
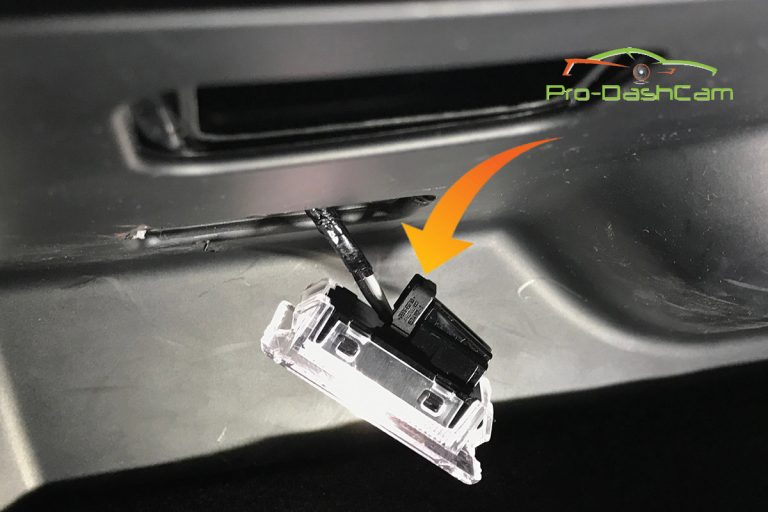
6. Installing the wire from the Tesland.com illuminated doorsill to the foot well lights.
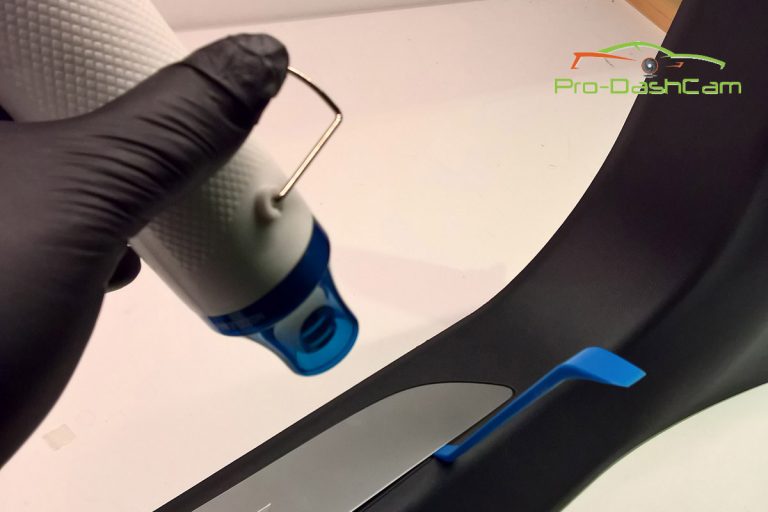
- Use a piece of folded electrical installation wire, (or a wire from a coat hanger) and put it through the hole from the foot well light up and to the forward side. Stick your hand between the carpet and the plastic and pull the wire down.
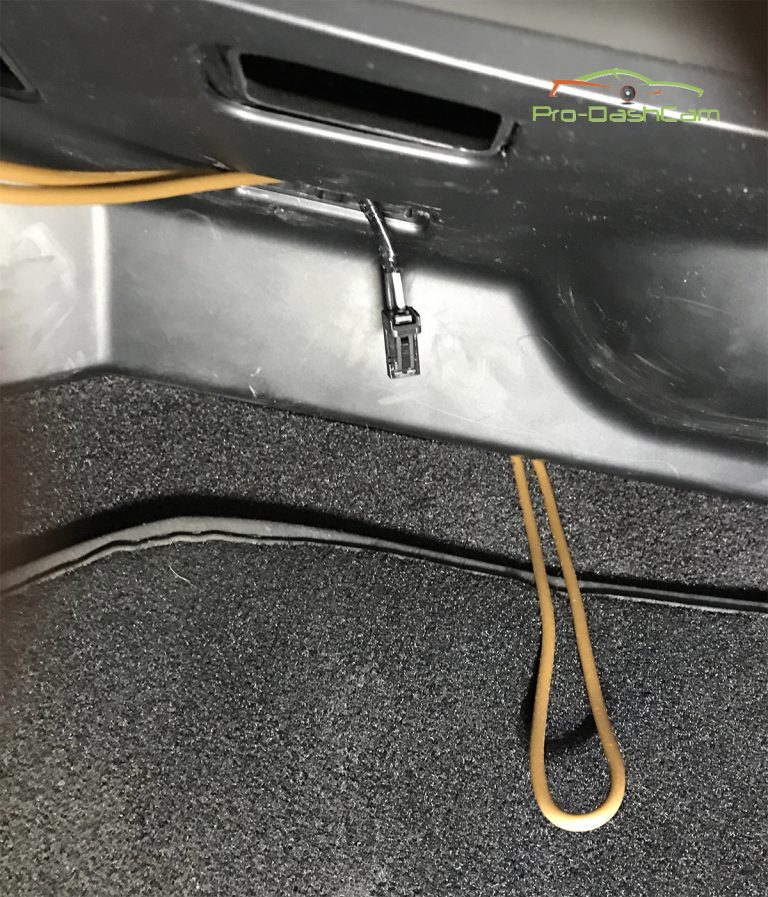
- Put the 2 connectors of the connection wire of the Tesland.com illuminated door sill through the loop.
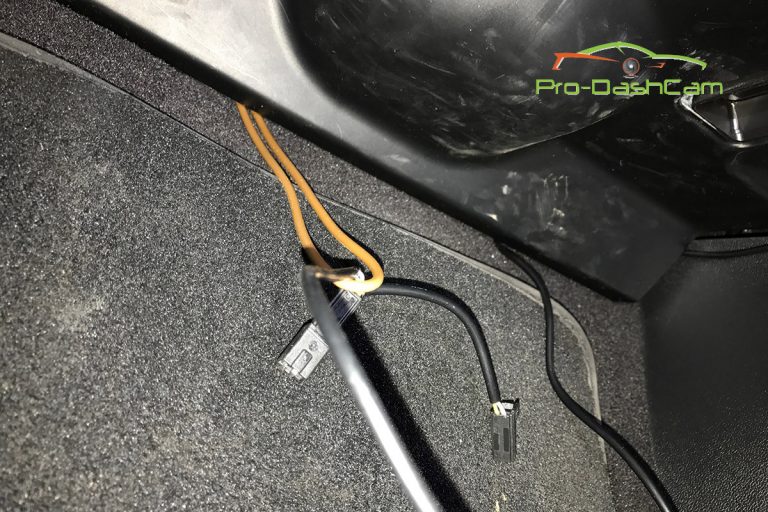
- Pull the cable back so the 2 connectors will appear in the hole where the foot well light will be installed. Do this gently, so not to damage the connection cable and its connectors. If the wire gets trapped pull it back and try again.
- CAUTION: Never put tension on the connectors of your Tesland.com illuminated door sill. This can damage the connectors or wires.
- WARNING: On the driver side, be very careful that the wire is wel clear of the steering column and pedals!!
- the best you can take out the torx screw underneath the dashboard on the lefthand side. Now you can lower the plastic cover under the steering wheel. Than you can lead the wire from the footwell light in the aft direction and than to the outboard side.
- On the connection cable of your Tesland.com illuminated door sill you will find the 2 connectors. Connect one end to the foot well light and the other to the connection cable which was originally connected to the foot well light. This can only be done in one way.
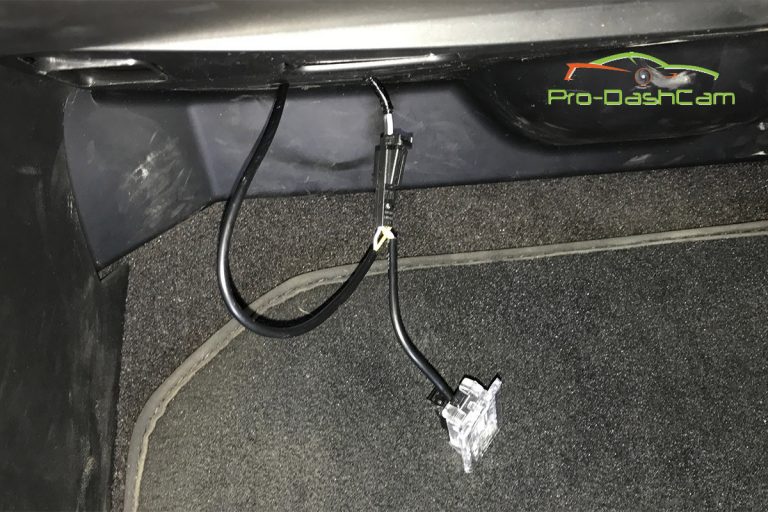
- Now close and open de door and see if your Tesland.com illuminated door sill and the foot well light function properly.
- After this you can install the foot well light and you can still see the connection cable to the Tesland.com illuminated door sills, tug them in behind the carpet/and plastic dashboard parts.
- Now you can do the same on the other side of your car.
